Prerequisites
- Complete the instructions in Deploy the Migration Assistant, including target cluster setup.
- Have a connection string for a source database that meets the Migration Assistant eligibility requirements. The database must be running and reachable from CockroachDB Cloud, and the connection user must be able to read the schema catalog and
SELECTdata.
Step 1. Connect and verify
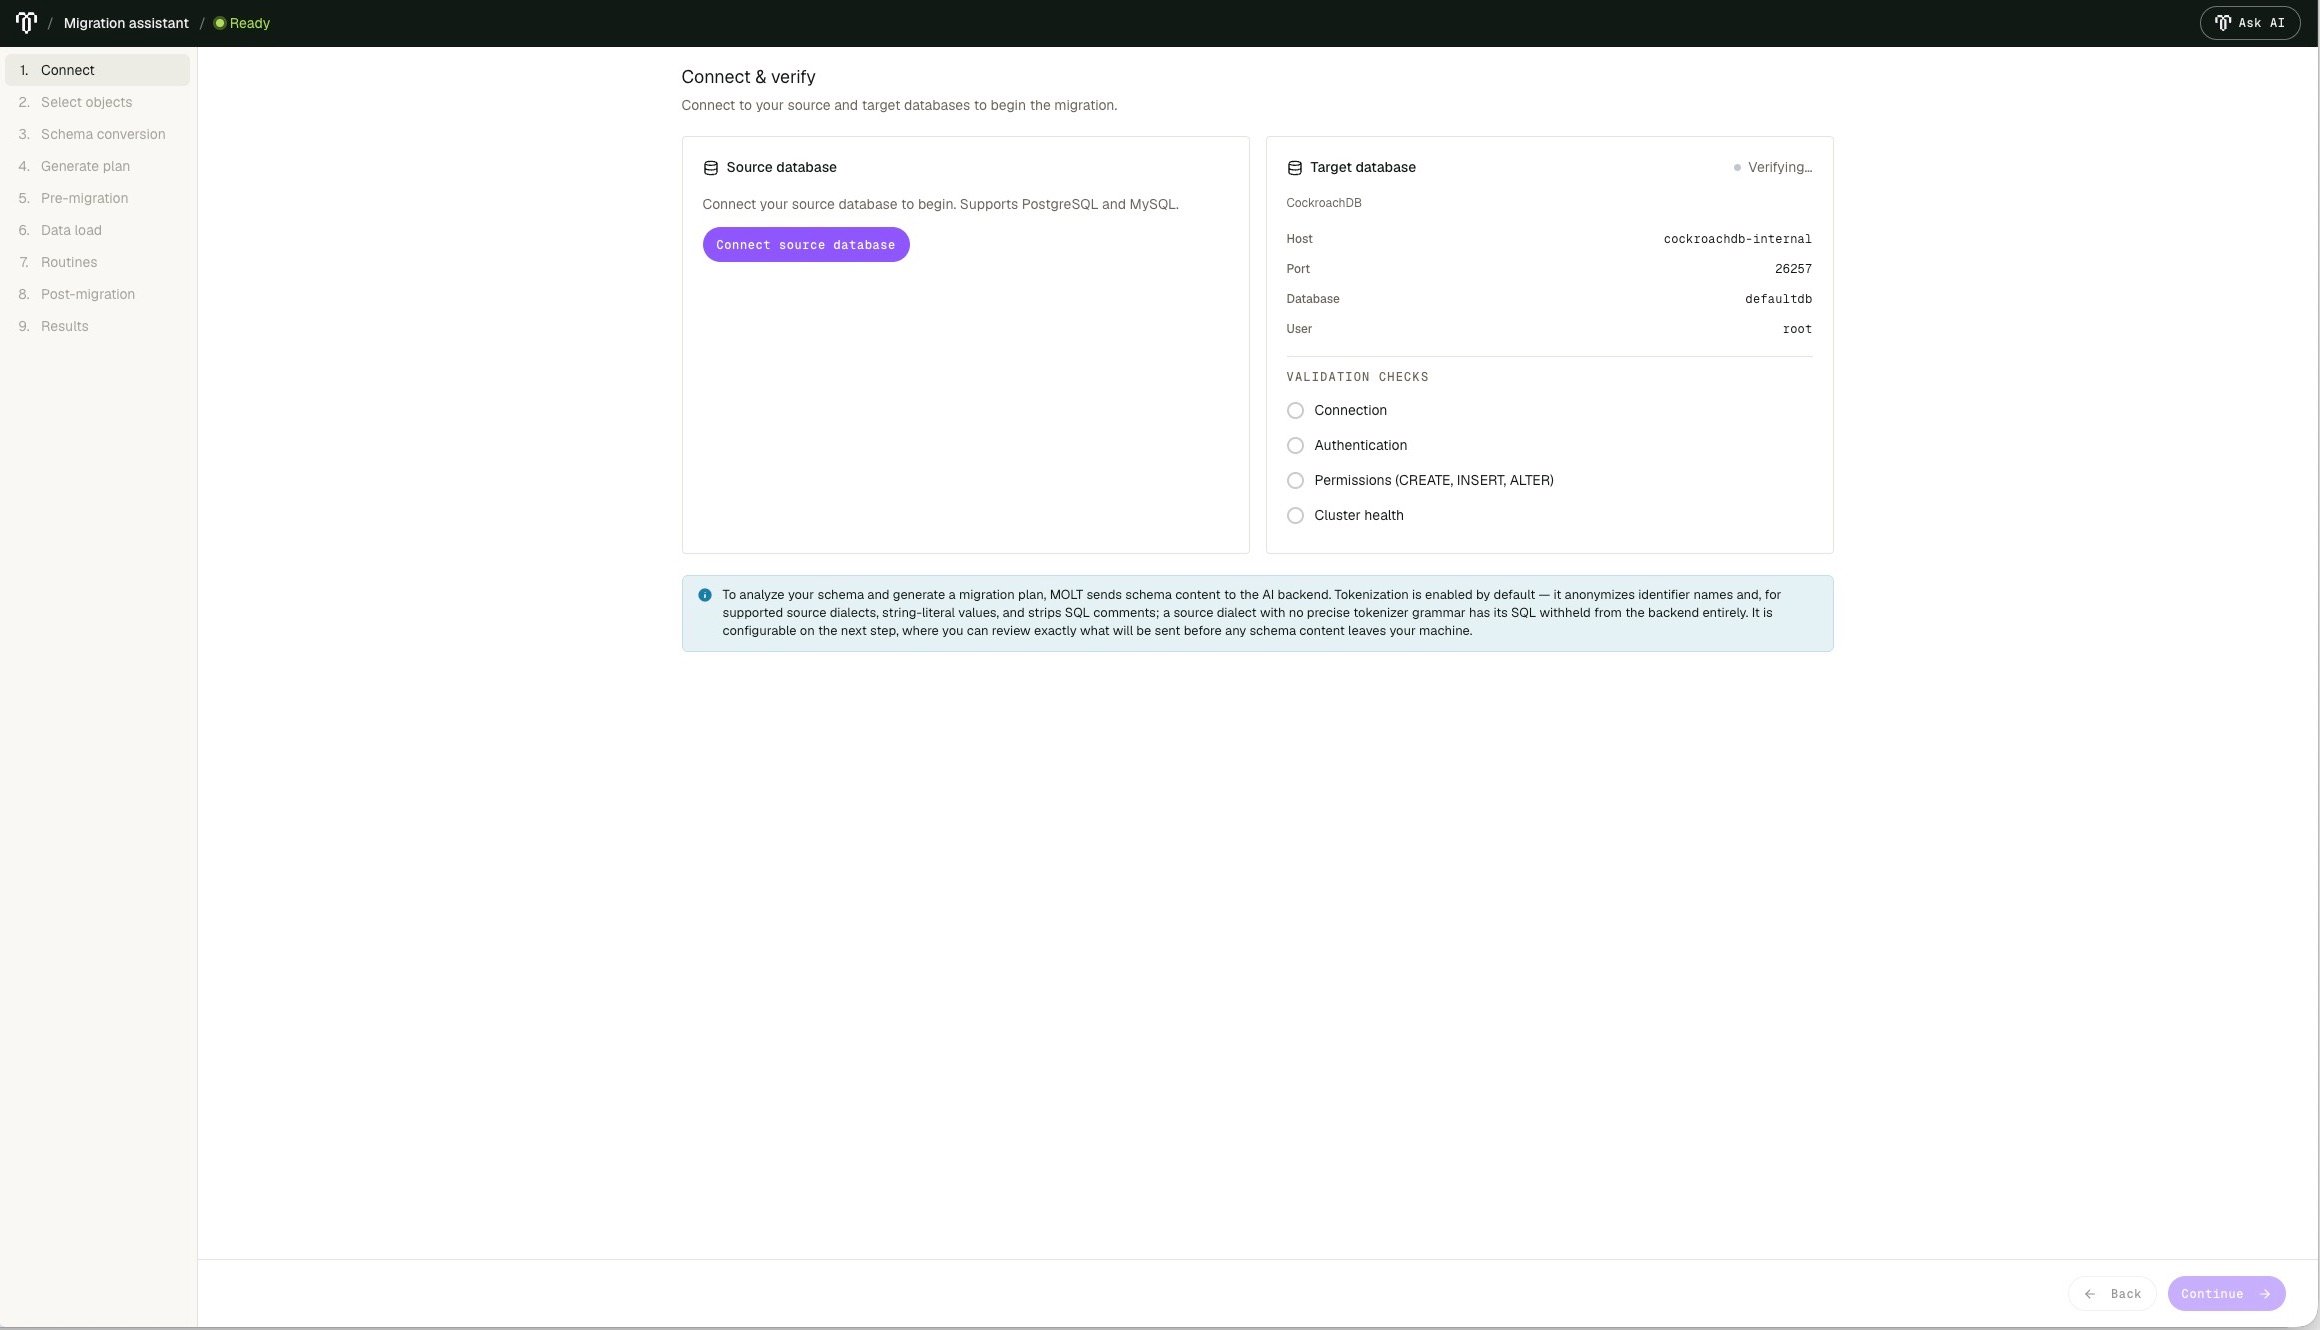
When you first open the Assistant page, the target connection is prefilled with the CockroachDB cluster where you deployed the Assistant.- Review the data-handling notice on the Connect & verify page.
- Enter the connection string for your source database. The source must be reachable from CockroachDB Cloud.
- Verify that the prefilled target connection identifies the cluster where you deployed the Assistant.
- Click Validate connections. The Assistant checks source connectivity, authentication,
SELECTaccess, and version compatibility. It checks target connectivity, authentication, schema-changing privileges, and cluster health. - If a check fails, correct the connection details or network access and validate again. Continue only after both databases report that they are ready.
Step 2. Select objects
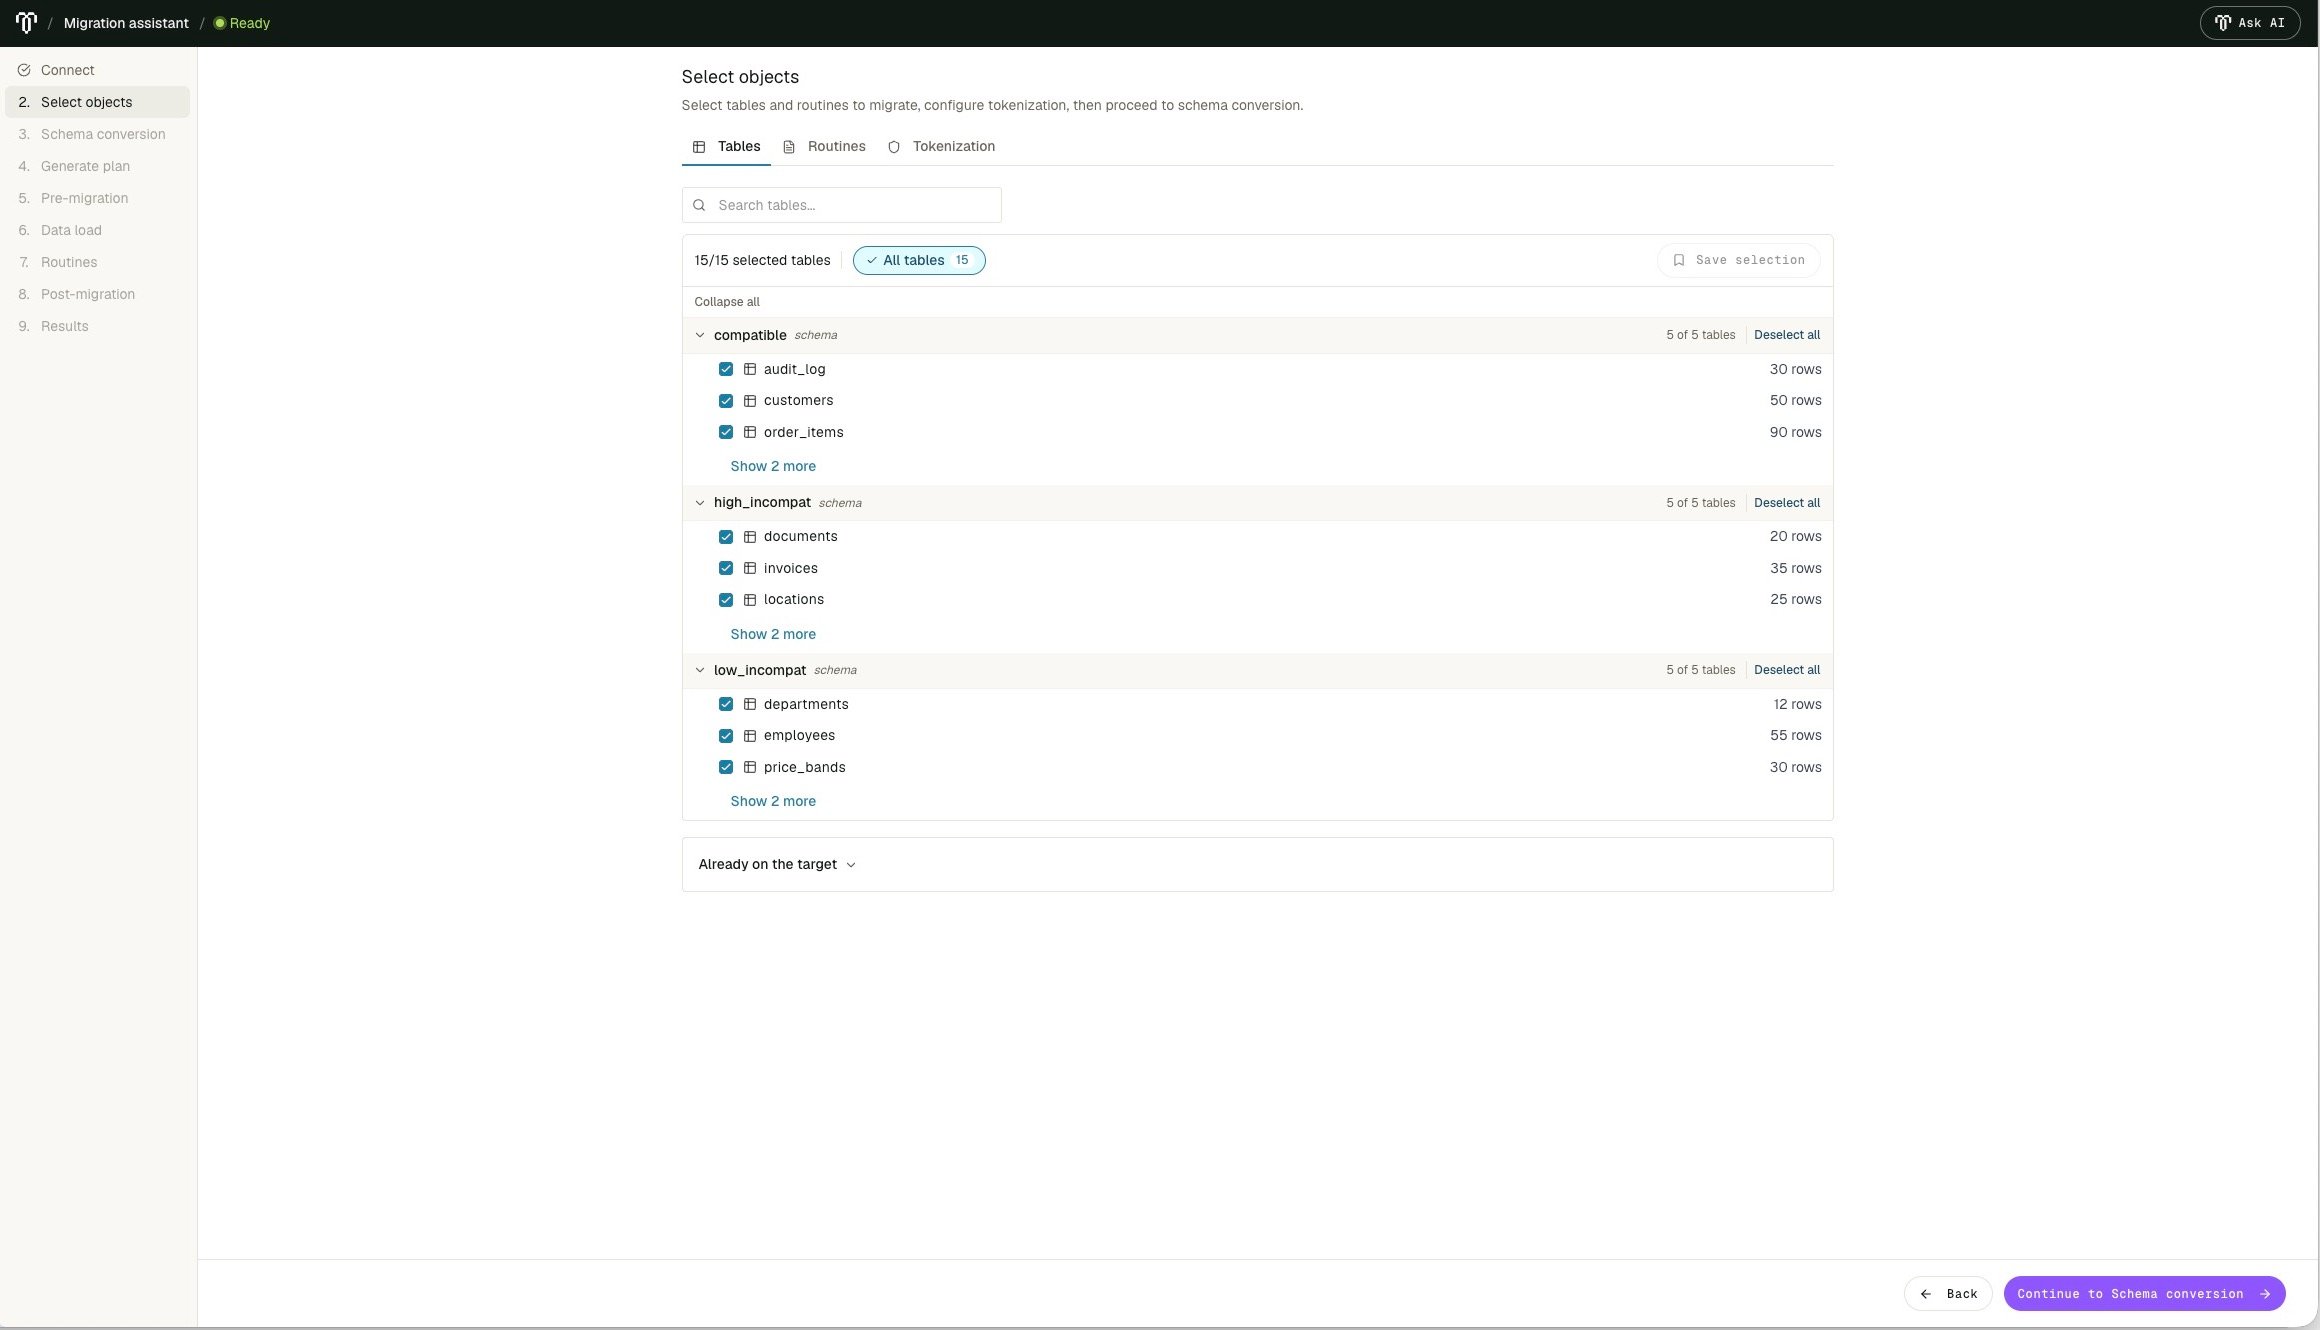
The Assistant discovers the source’s tables and routines.- On the Tables and Routines tabs, select the objects to migrate. You can search and filter the discovered objects.
- Review objects that the Assistant reports as already existing on the target.
- Review the tokenization settings. Tokenization obfuscates the names of schema objects before schema content is shared with the Migration agent. For details, refer to What is shared with the Migration agent.
- Click Save selection, and then continue to schema conversion.
Step 3. Convert and review the schema
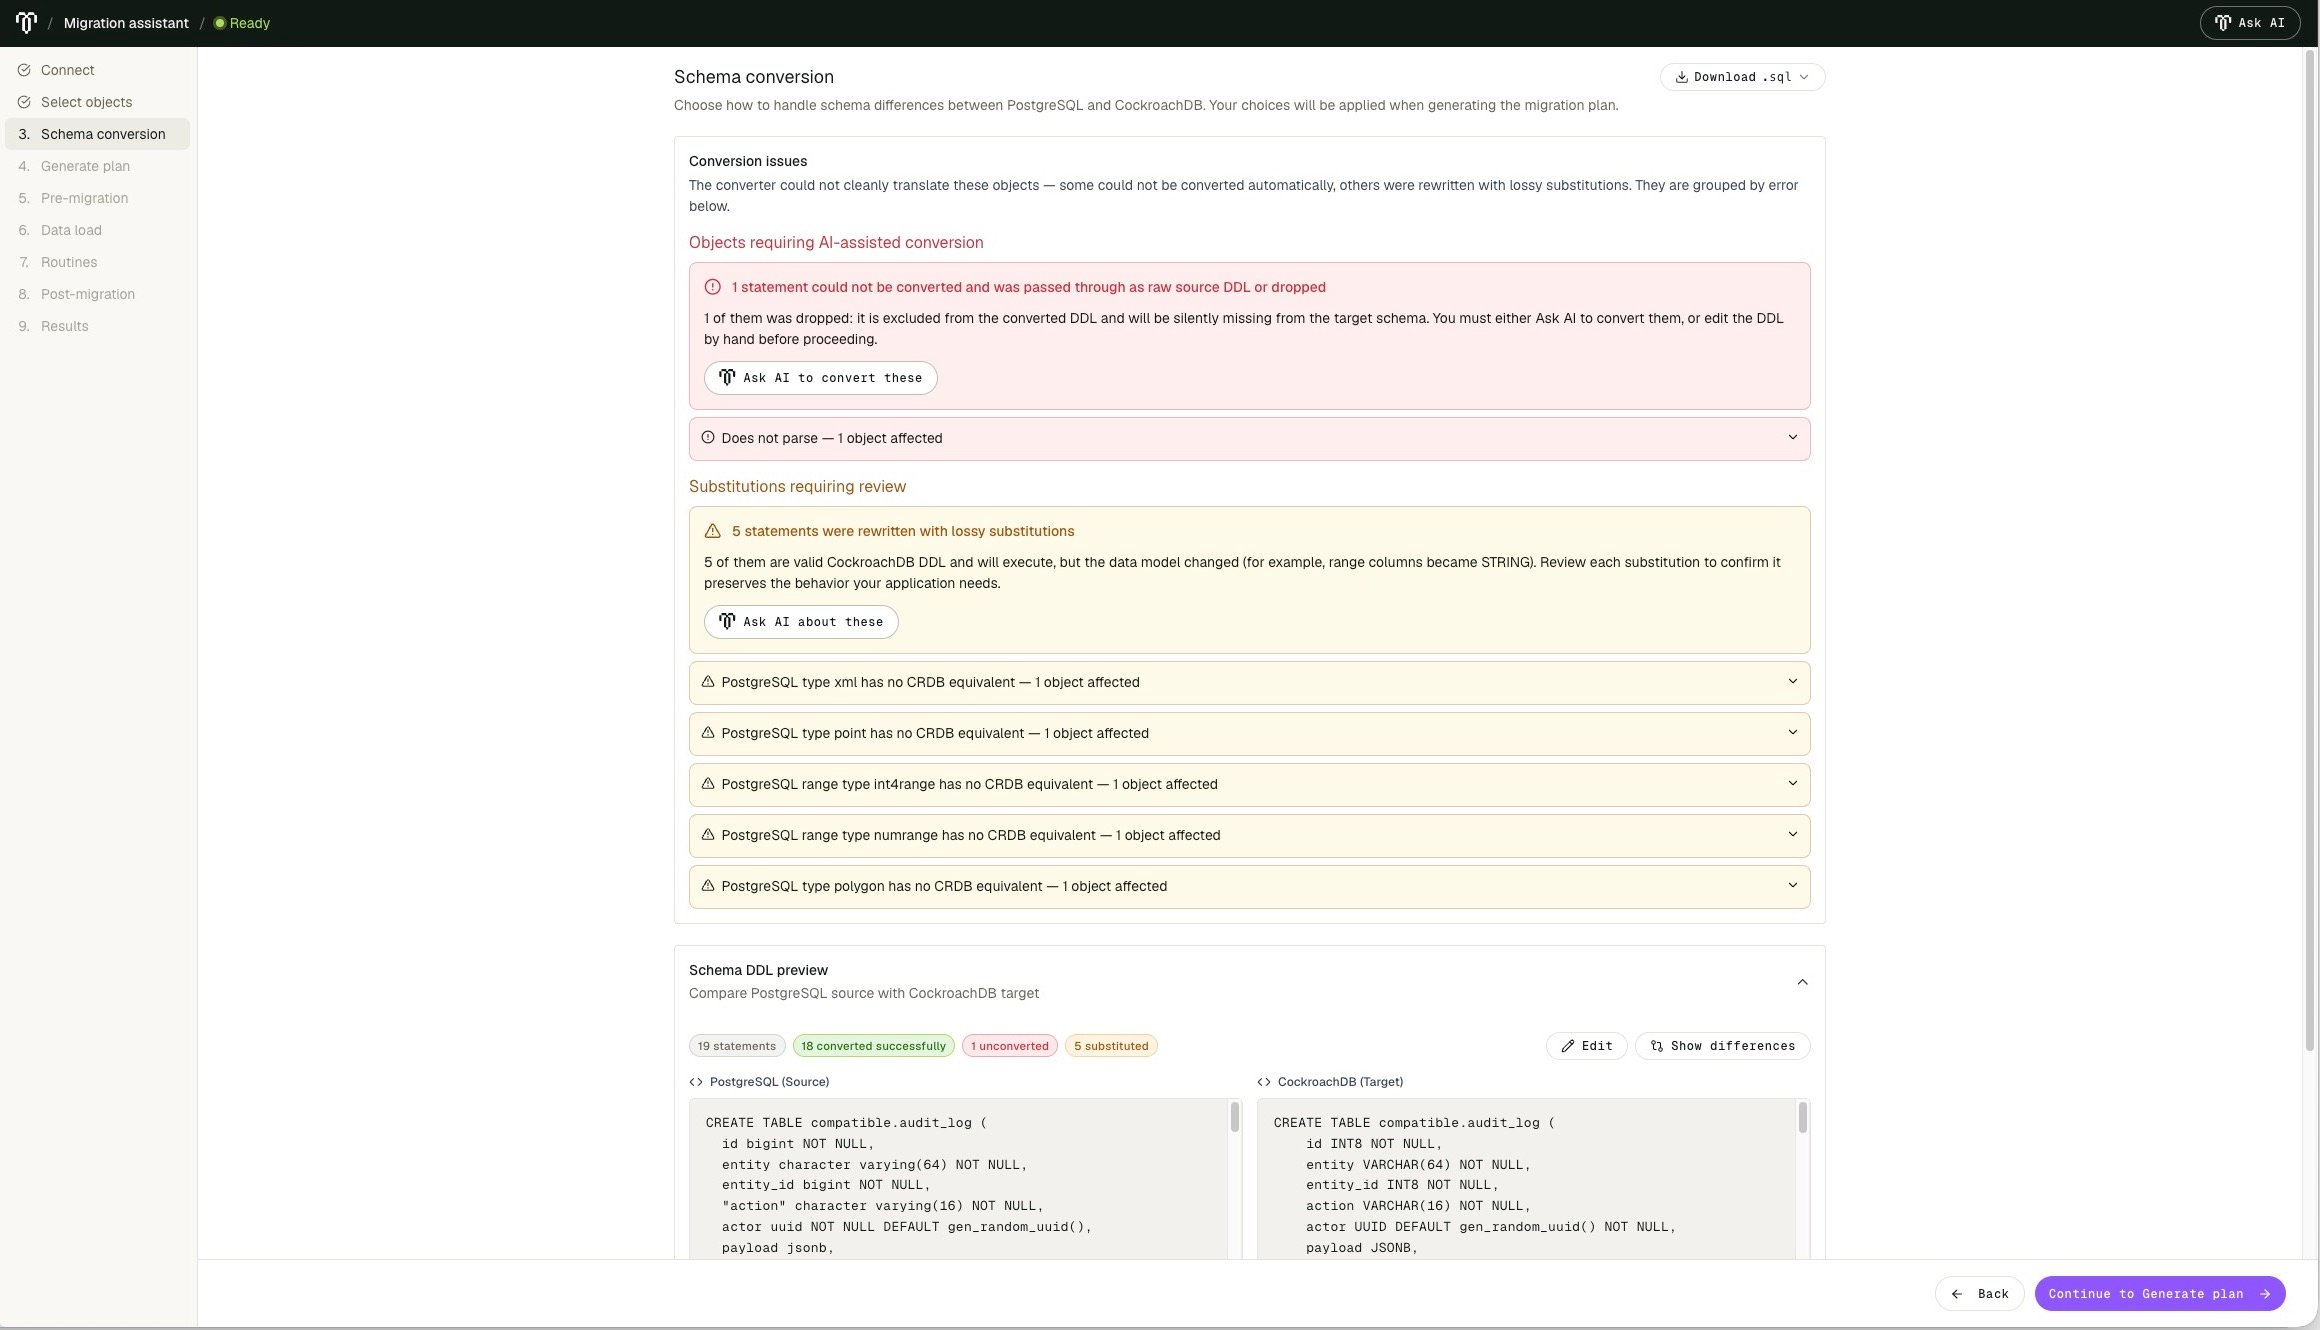
The Assistant converts the selected source schema to CockroachDB DDL. It separates statements that could not be converted from statements that contain valid but lossy substitutions.- Review the conversion summary, including every unconverted statement and lossy substitution.
- Compare the source and target data definition language (DDL). Edit the target DDL when necessary, or download the converted DDL for offline review.
- For an unconverted statement, click Ask AI to convert these to request a conversion and an explanation of its behavioral differences.
- For grouped substitutions, click Ask AI about these to request an explanation of the changes and their application impact.
- Apply a Migration agent suggestion only after confirming that its target DDL and data semantics are appropriate for your workload.
- Continue after you have reviewed each conversion failure and lossy substitution and accounted for any required follow-up work.
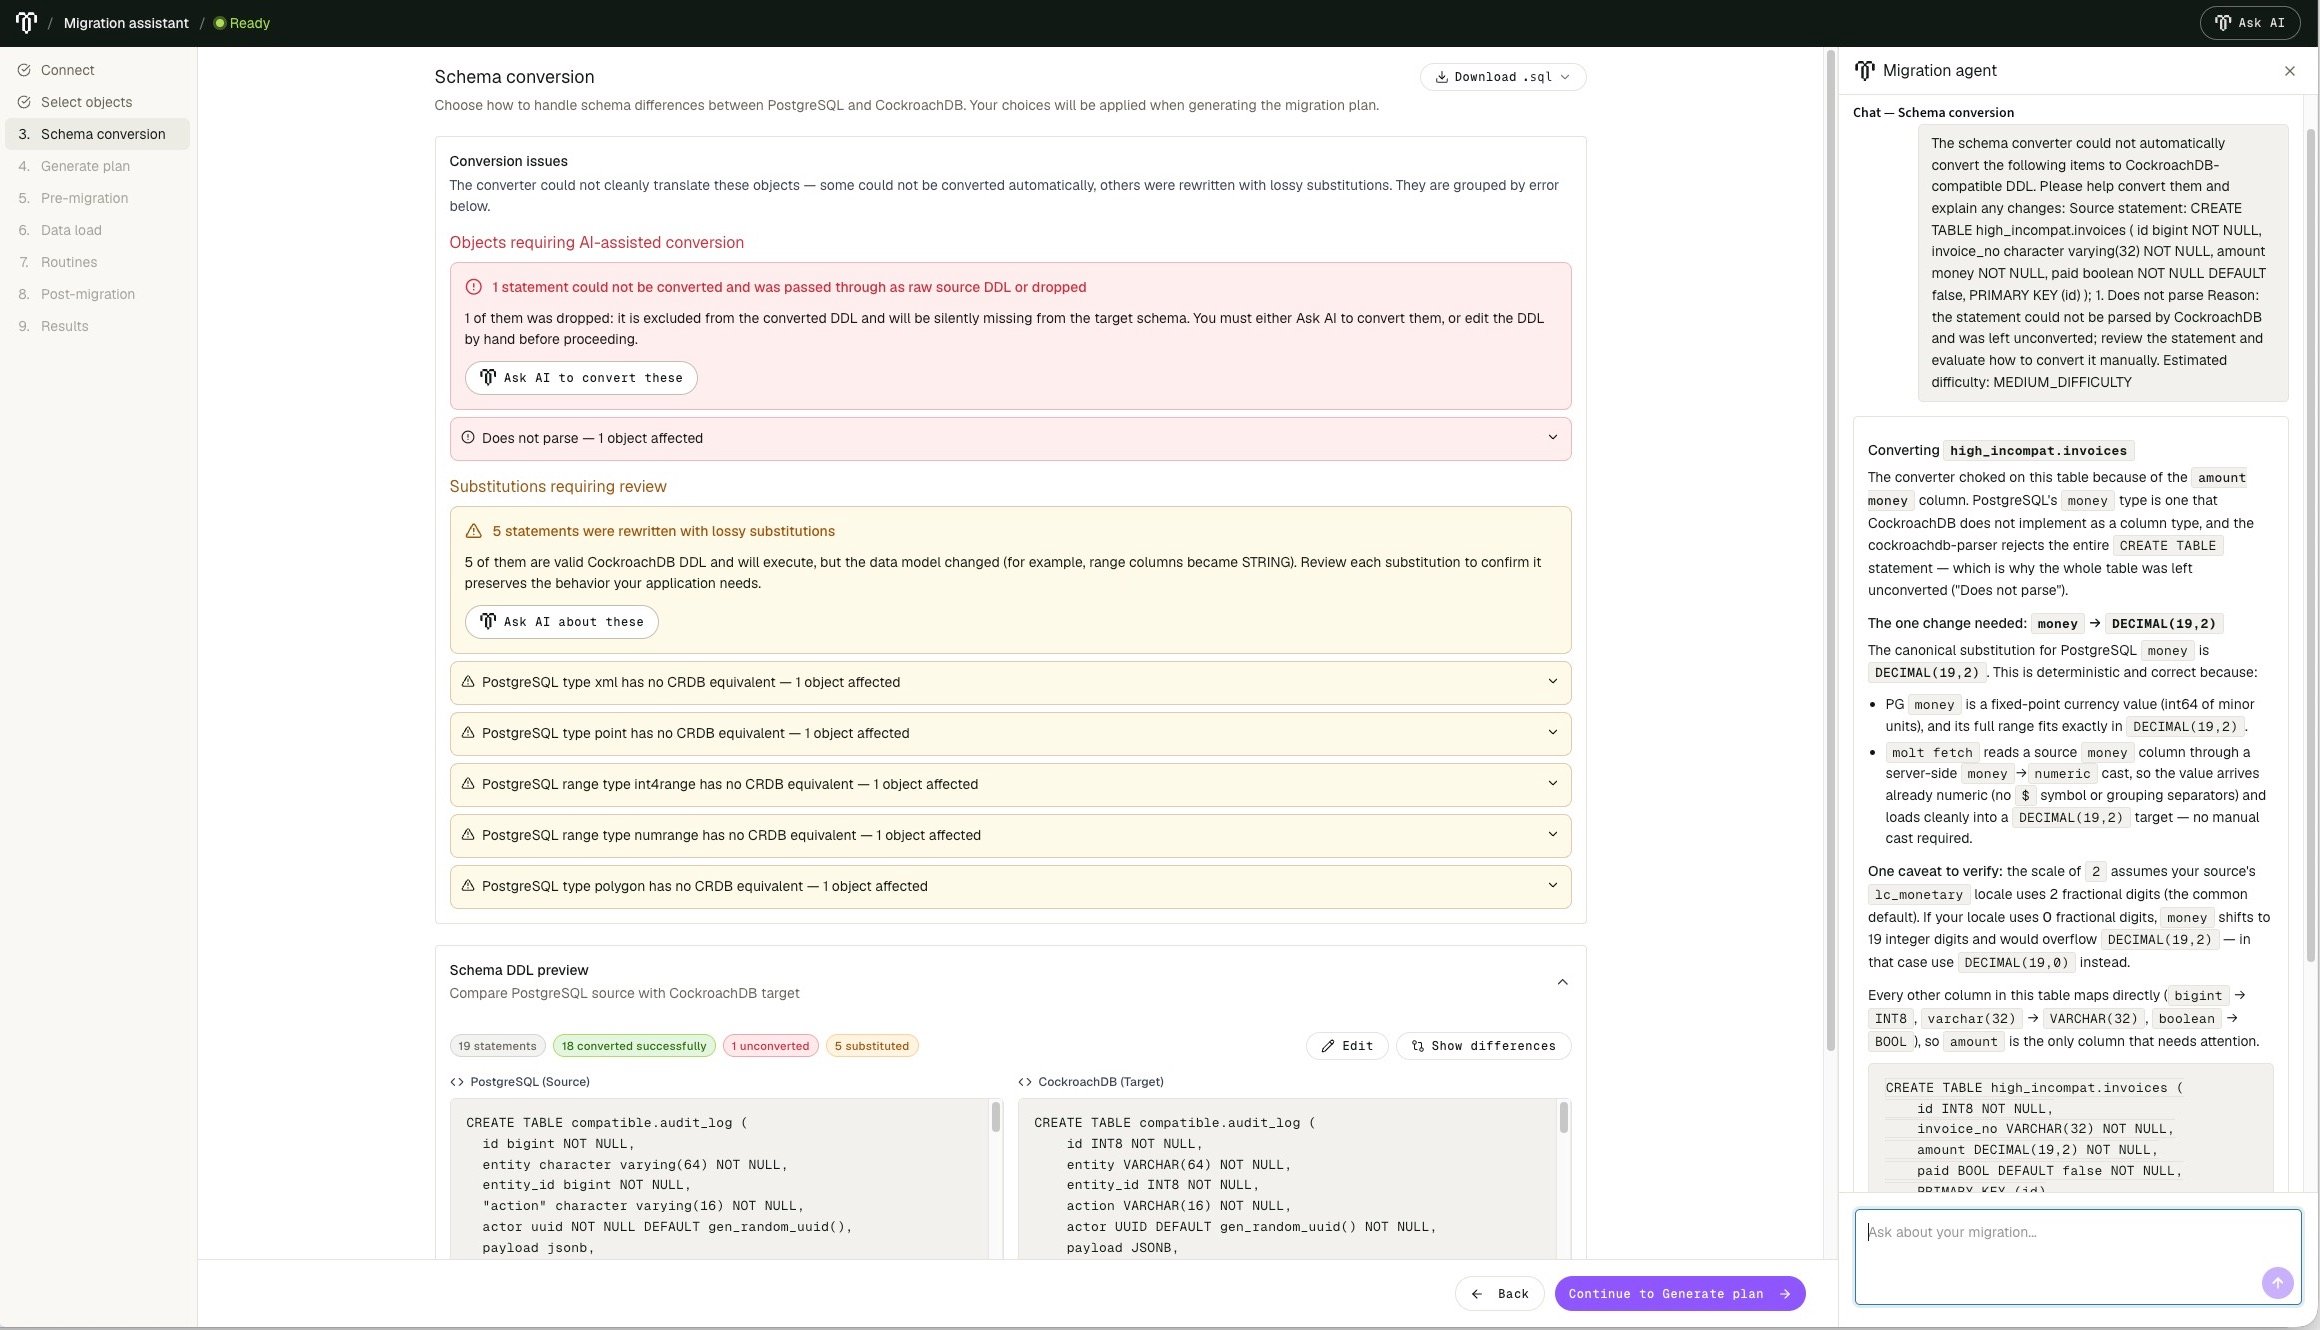
Executable DDL is not necessarily behaviorally equivalent to the source schema. Review application behavior, constraints, and data modeling for every lossy substitution.
Step 4. Generate and review the migration plan
The Assistant assesses the selected objects and your schema-conversion decisions, then generates an ordered migration plan.- Review the compatibility rating and the counts of pre-migration steps, table migrations, routine conversions, and post-migration steps.
- Review the listed issues and warnings, and make note of any that will require a follow-up action.
- Review warnings and plan notes, including the data-load mode, type conversions, foreign-key handling, source statistics, network and TLS requirements, and routines that require individual review.
Step 5. Complete pre-migration steps
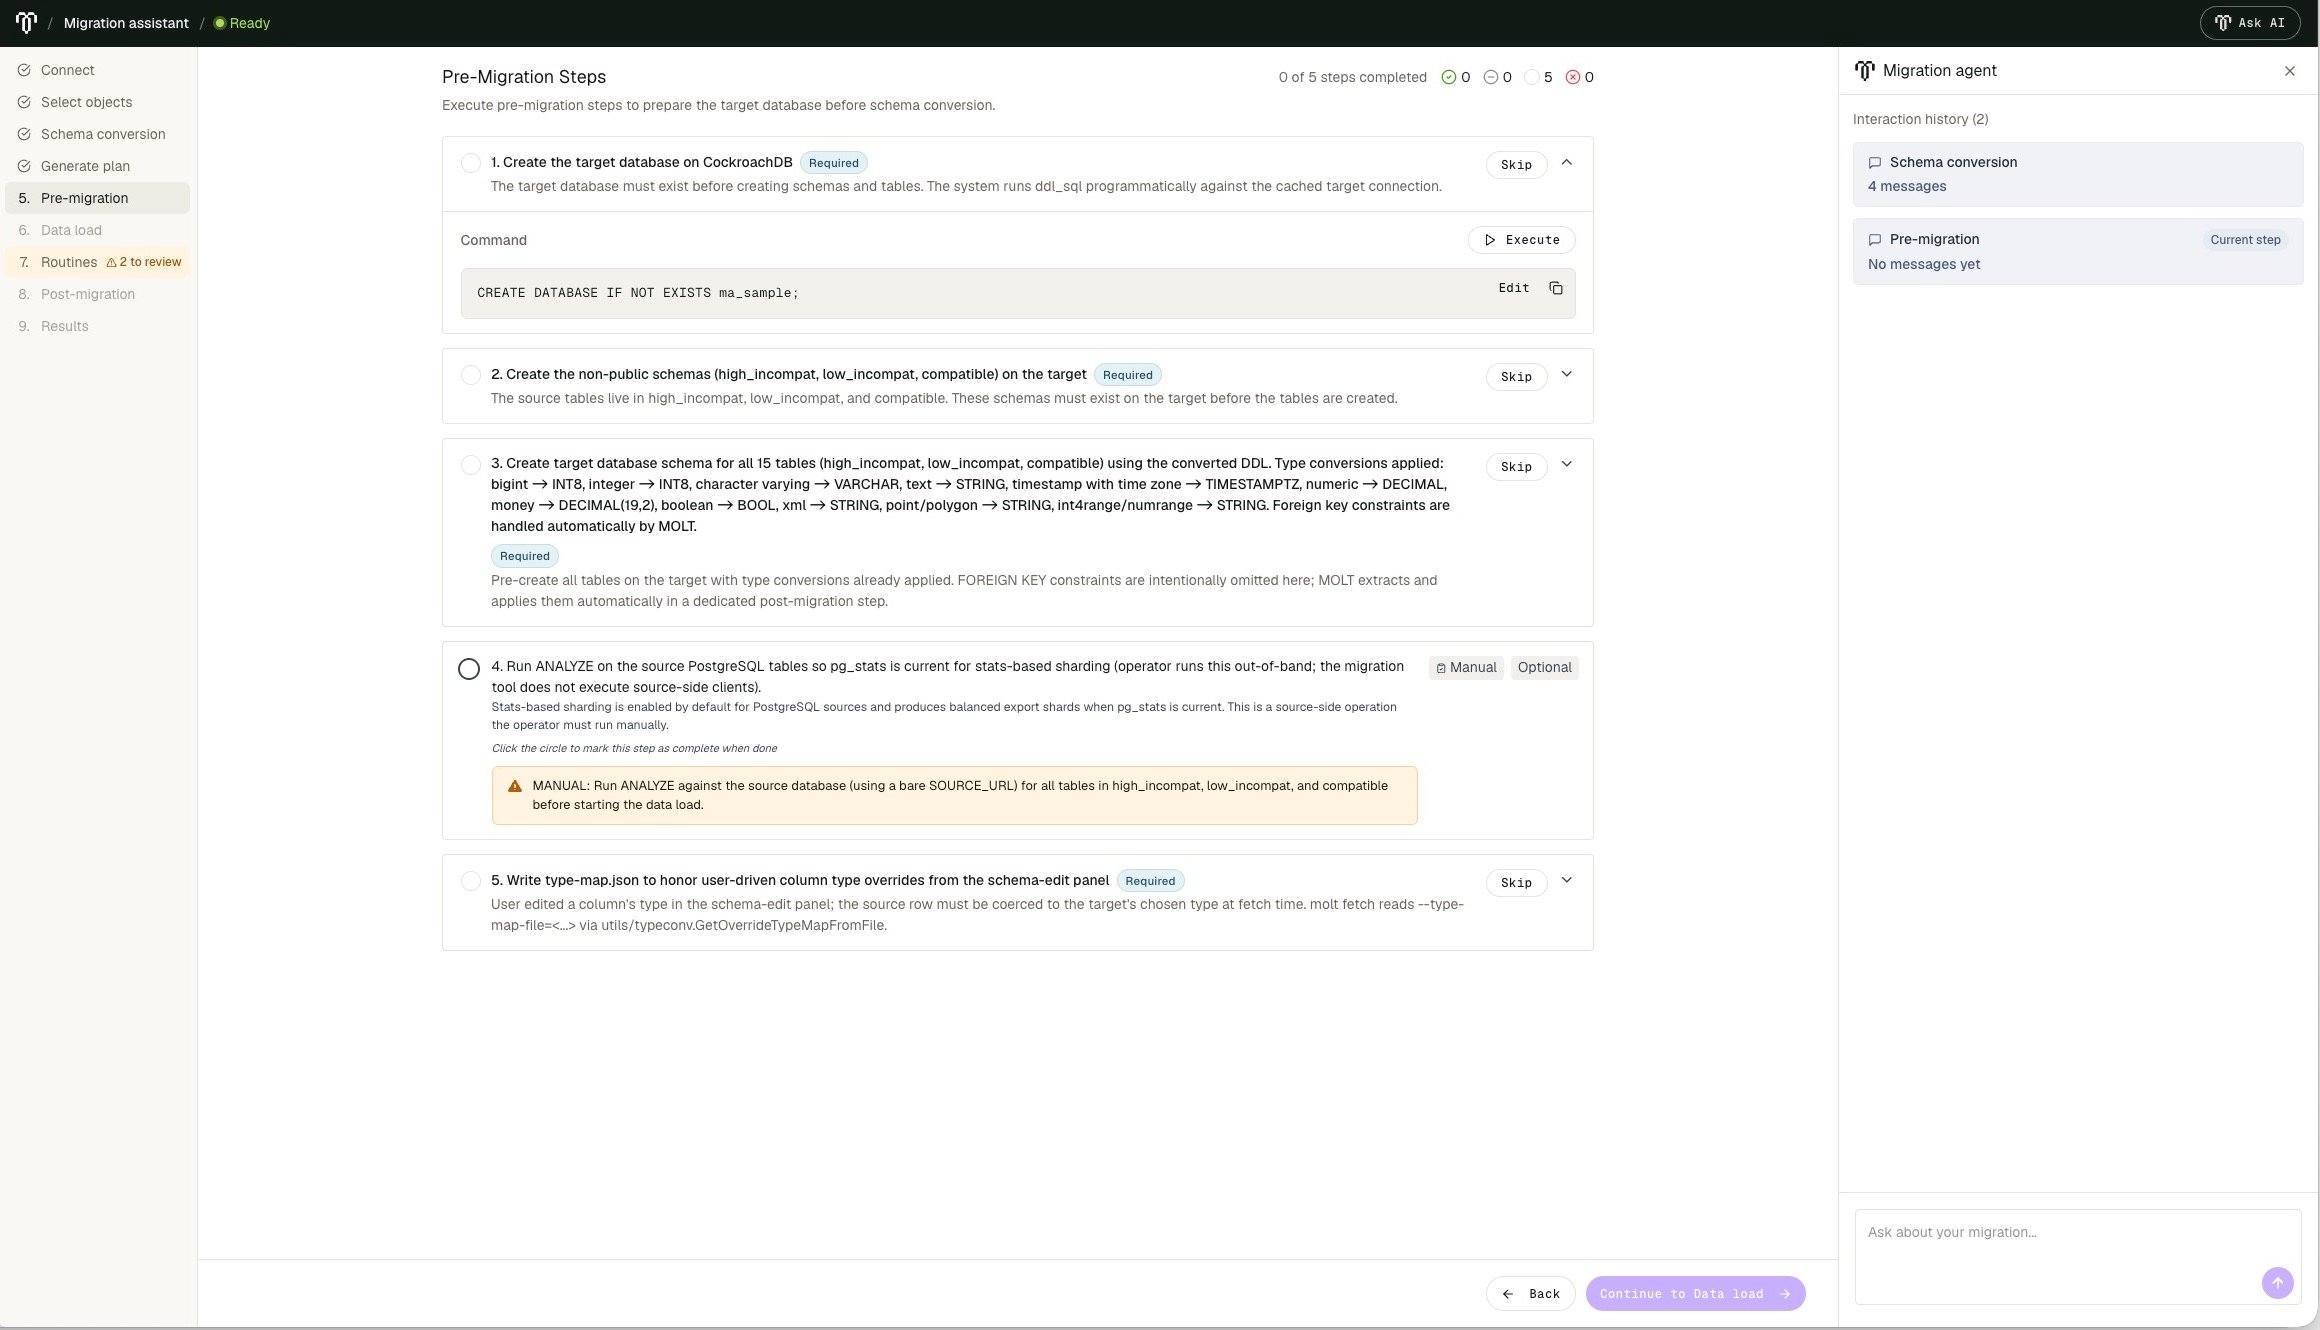
The plan can contain required, optional, executable, and manual steps.- Review the entire list and expand each step to inspect its command or instructions.
- For an executable step, review the generated command and click Execute.
- Perform manual steps outside the Assistant.
- Click Skip only when an optional step does not apply, or you have satisfied the prerequisite elsewhere.
- Confirm that all required pre-migration steps are complete before continuing.
Step 6. Load data
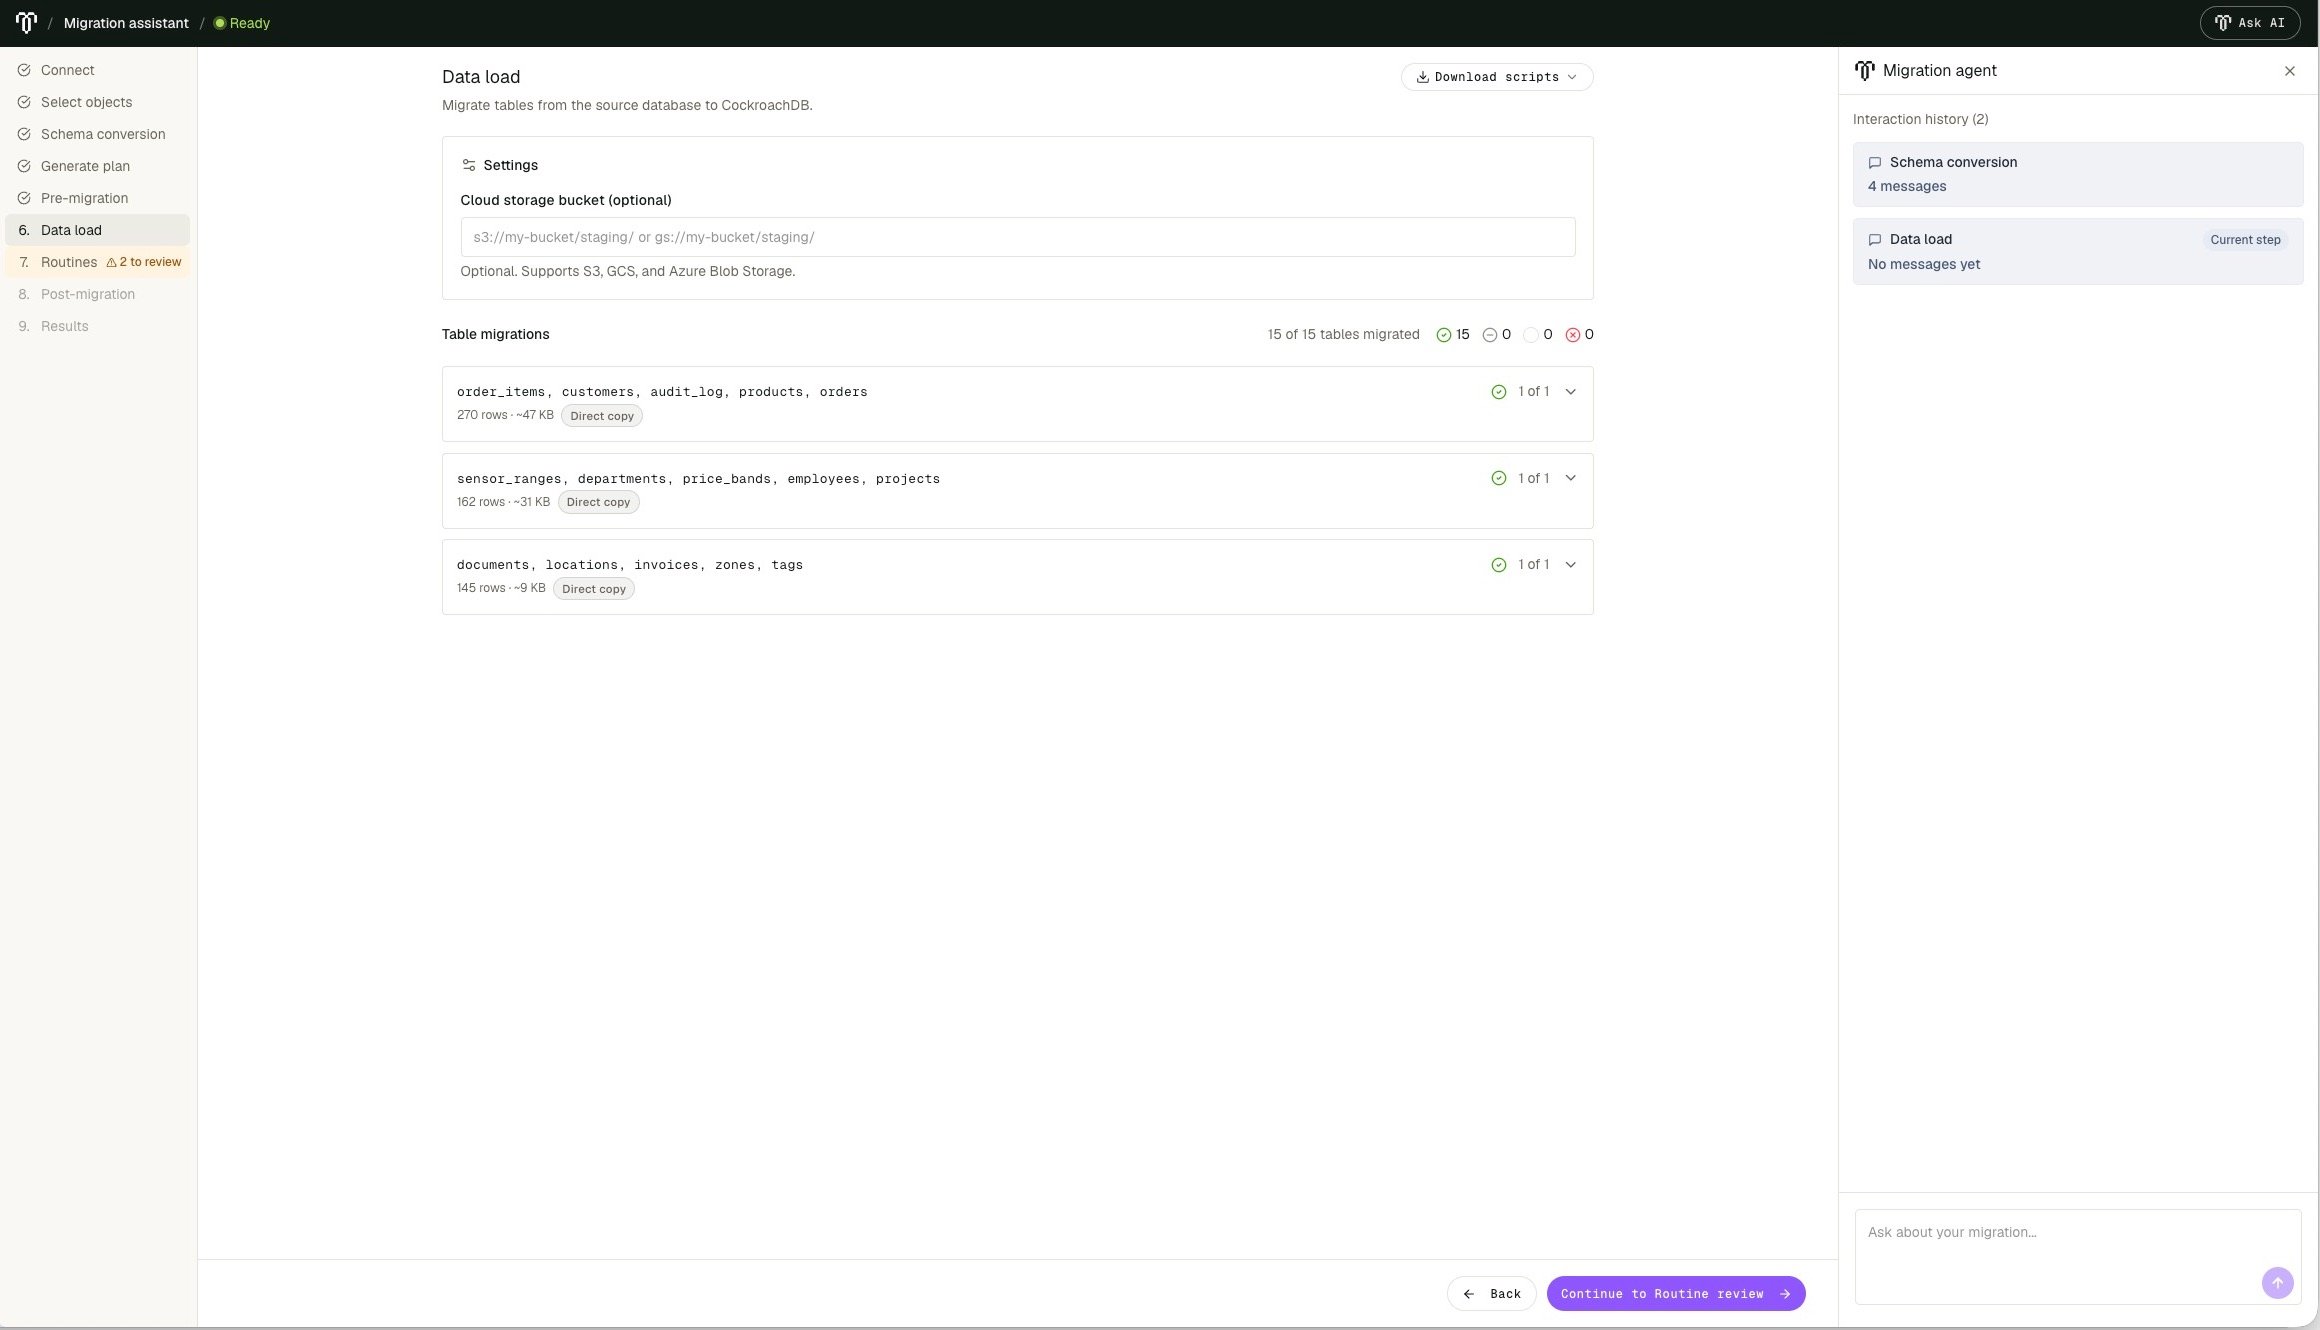
The Assistant generates and runs MOLT Fetch commands to move the selected data to the target cluster.- Review the generated scripts and the plan’s data-load mode before execution.
- Click Execute for each table-migration batch and monitor the live MOLT output.
- If a batch fails, review its output and the displayed recovery instructions before retrying it.
- Confirm that every selected table has migrated before continuing.
Step 7. Review, create, and test routines
The Assistant classifies stored procedures and user-defined functions as direct copy, minor fix, assisted rewrite, or manual rewrite.- Review the classification, converted SQL, explanation, confidence, and risk factors for every routine.
- Click Create all for direct-copy and minor-fix routines. Assisted and manual rewrites require individual decisions.
- For an assisted rewrite, compare the source and converted SQL, edit the proposed SQL if necessary, and acknowledge its risks before creating it.
- Review the generated tests before running them. Source execution requires explicit consent; otherwise, the Assistant tests only the target.
- Compare source and target results when source testing is enabled.
- Rewrite unsupported routines outside the Assistant, or skip them and record the required follow-up work.
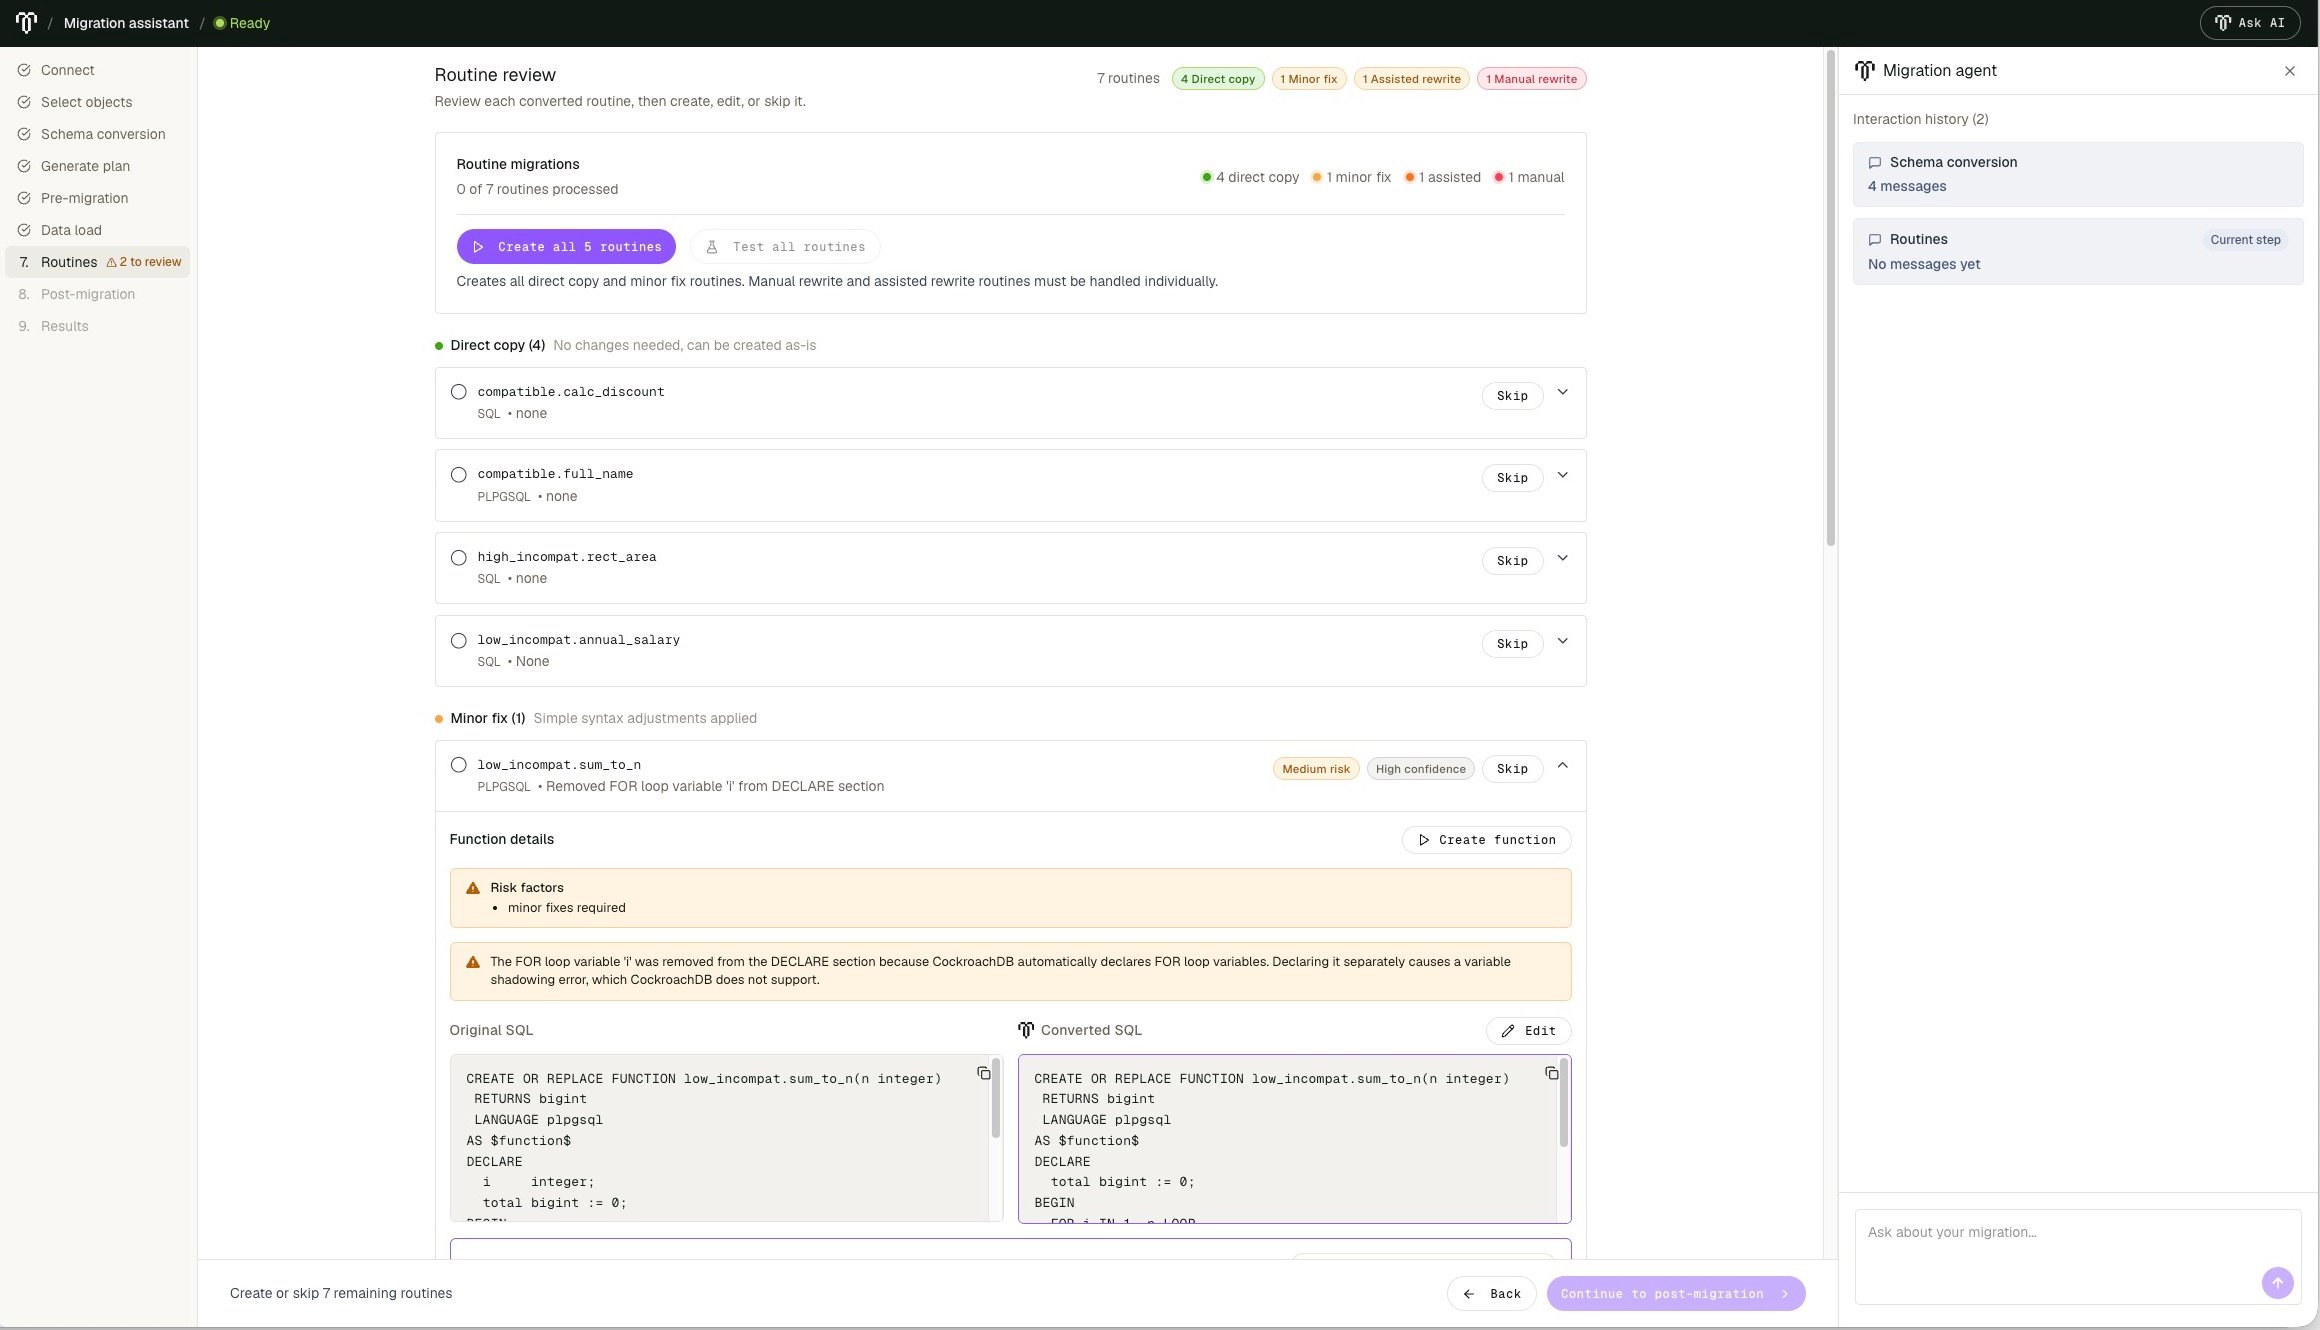
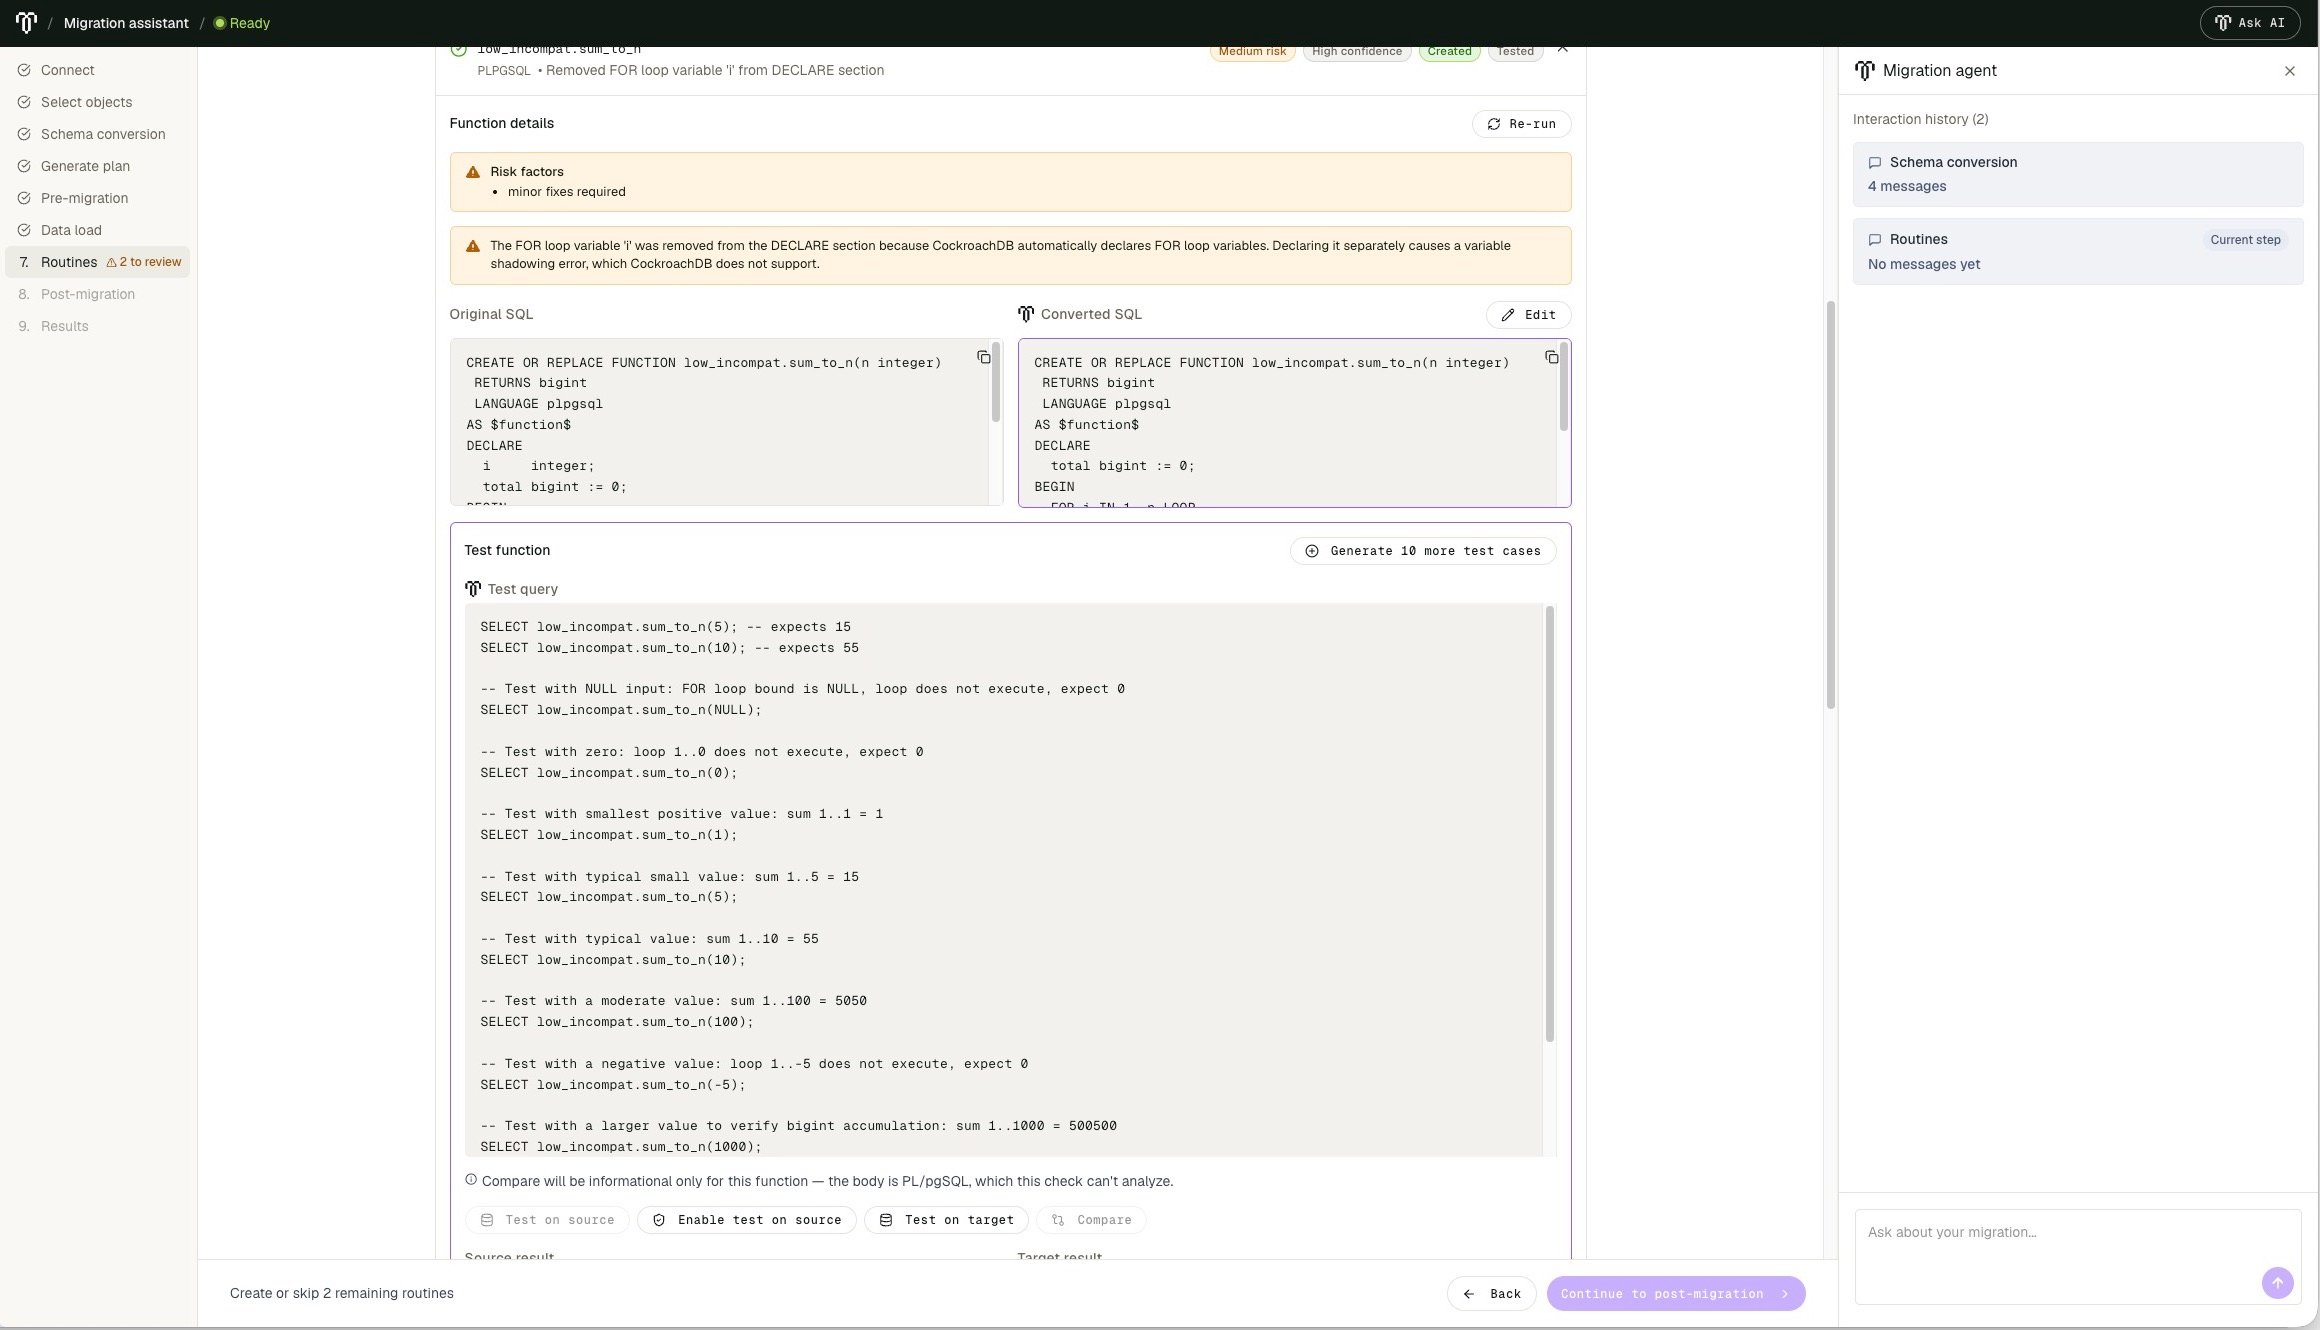
A successful target-only test does not establish source and target behavioral equivalence. Review generated tests carefully, and test migrated application behavior separately.
Step 8. Complete post-migration work
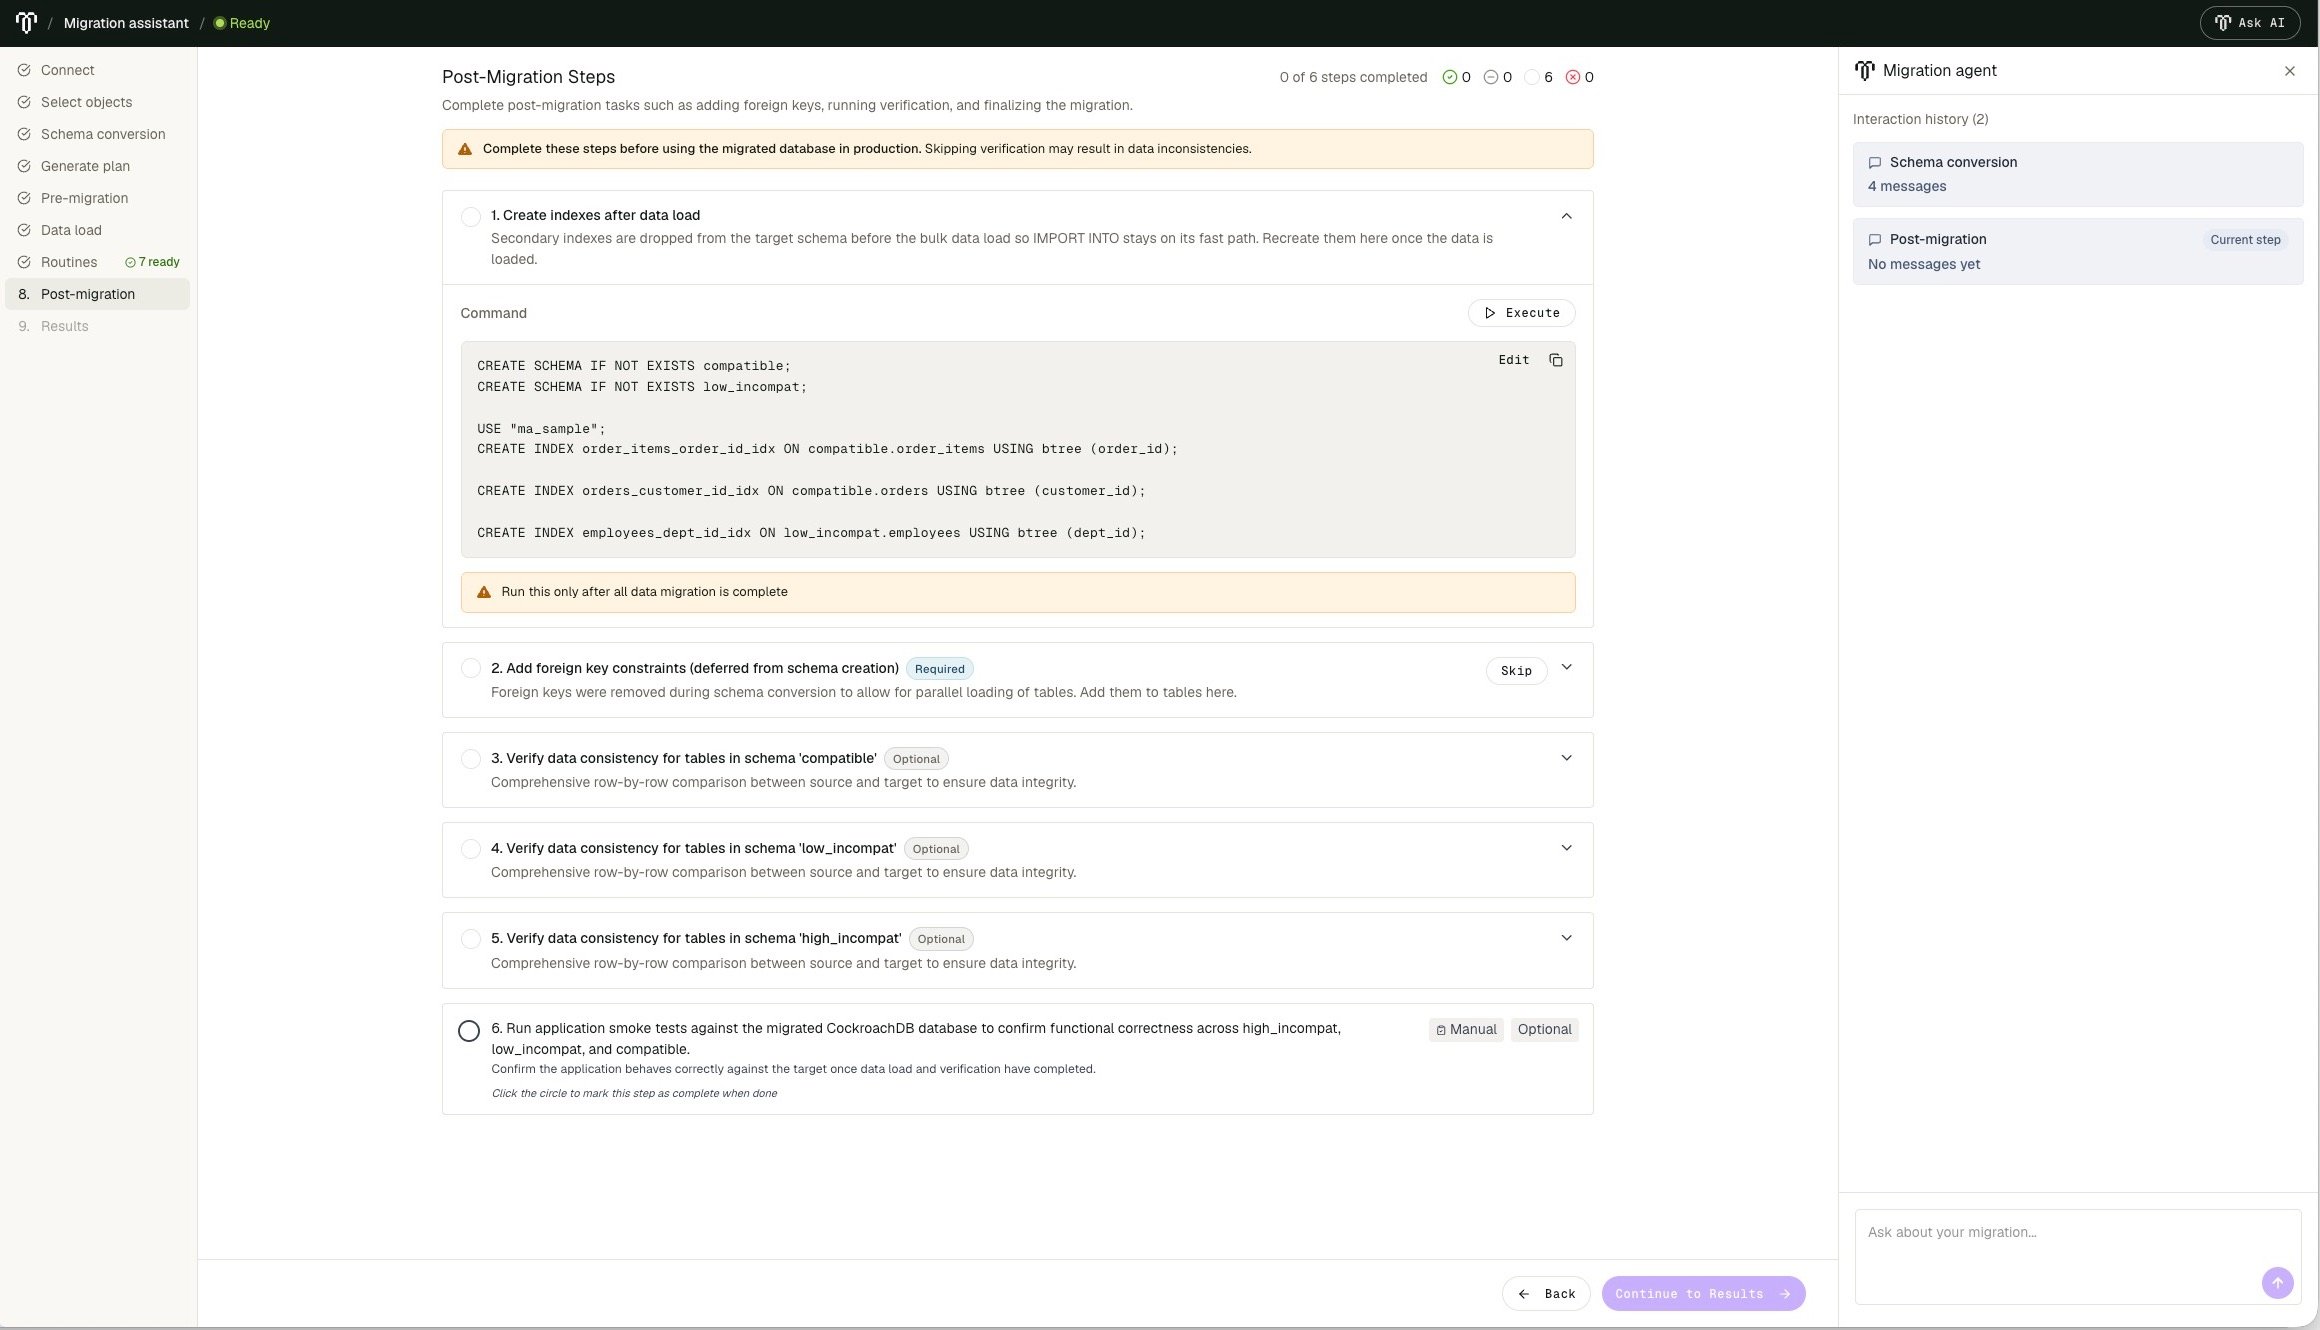
Post-migration steps restore database objects omitted for load performance and verify the migrated data.- Review every required and optional post-migration step.
- After all data loads finish, execute the steps that recreate secondary indexes and deferred foreign keys.
- Run MOLT Verify for every migrated schema and review the output for row-count or data mismatches.
- Before application testing or cutover, manually configure the required users, roles, ownership, privileges, and row-level security on the target. The Assistant does not migrate this configuration; refer to PostgreSQL compatibility.
- Run basic application tests against the target using the application’s database user, including checks of its access permissions.
For a low-downtime migration, configure ongoing replication with MOLT Replicator and plan the application cutover separately. The Migration Assistant does not run ongoing replication or perform application cutover.
Step 9. Review results and plan next steps
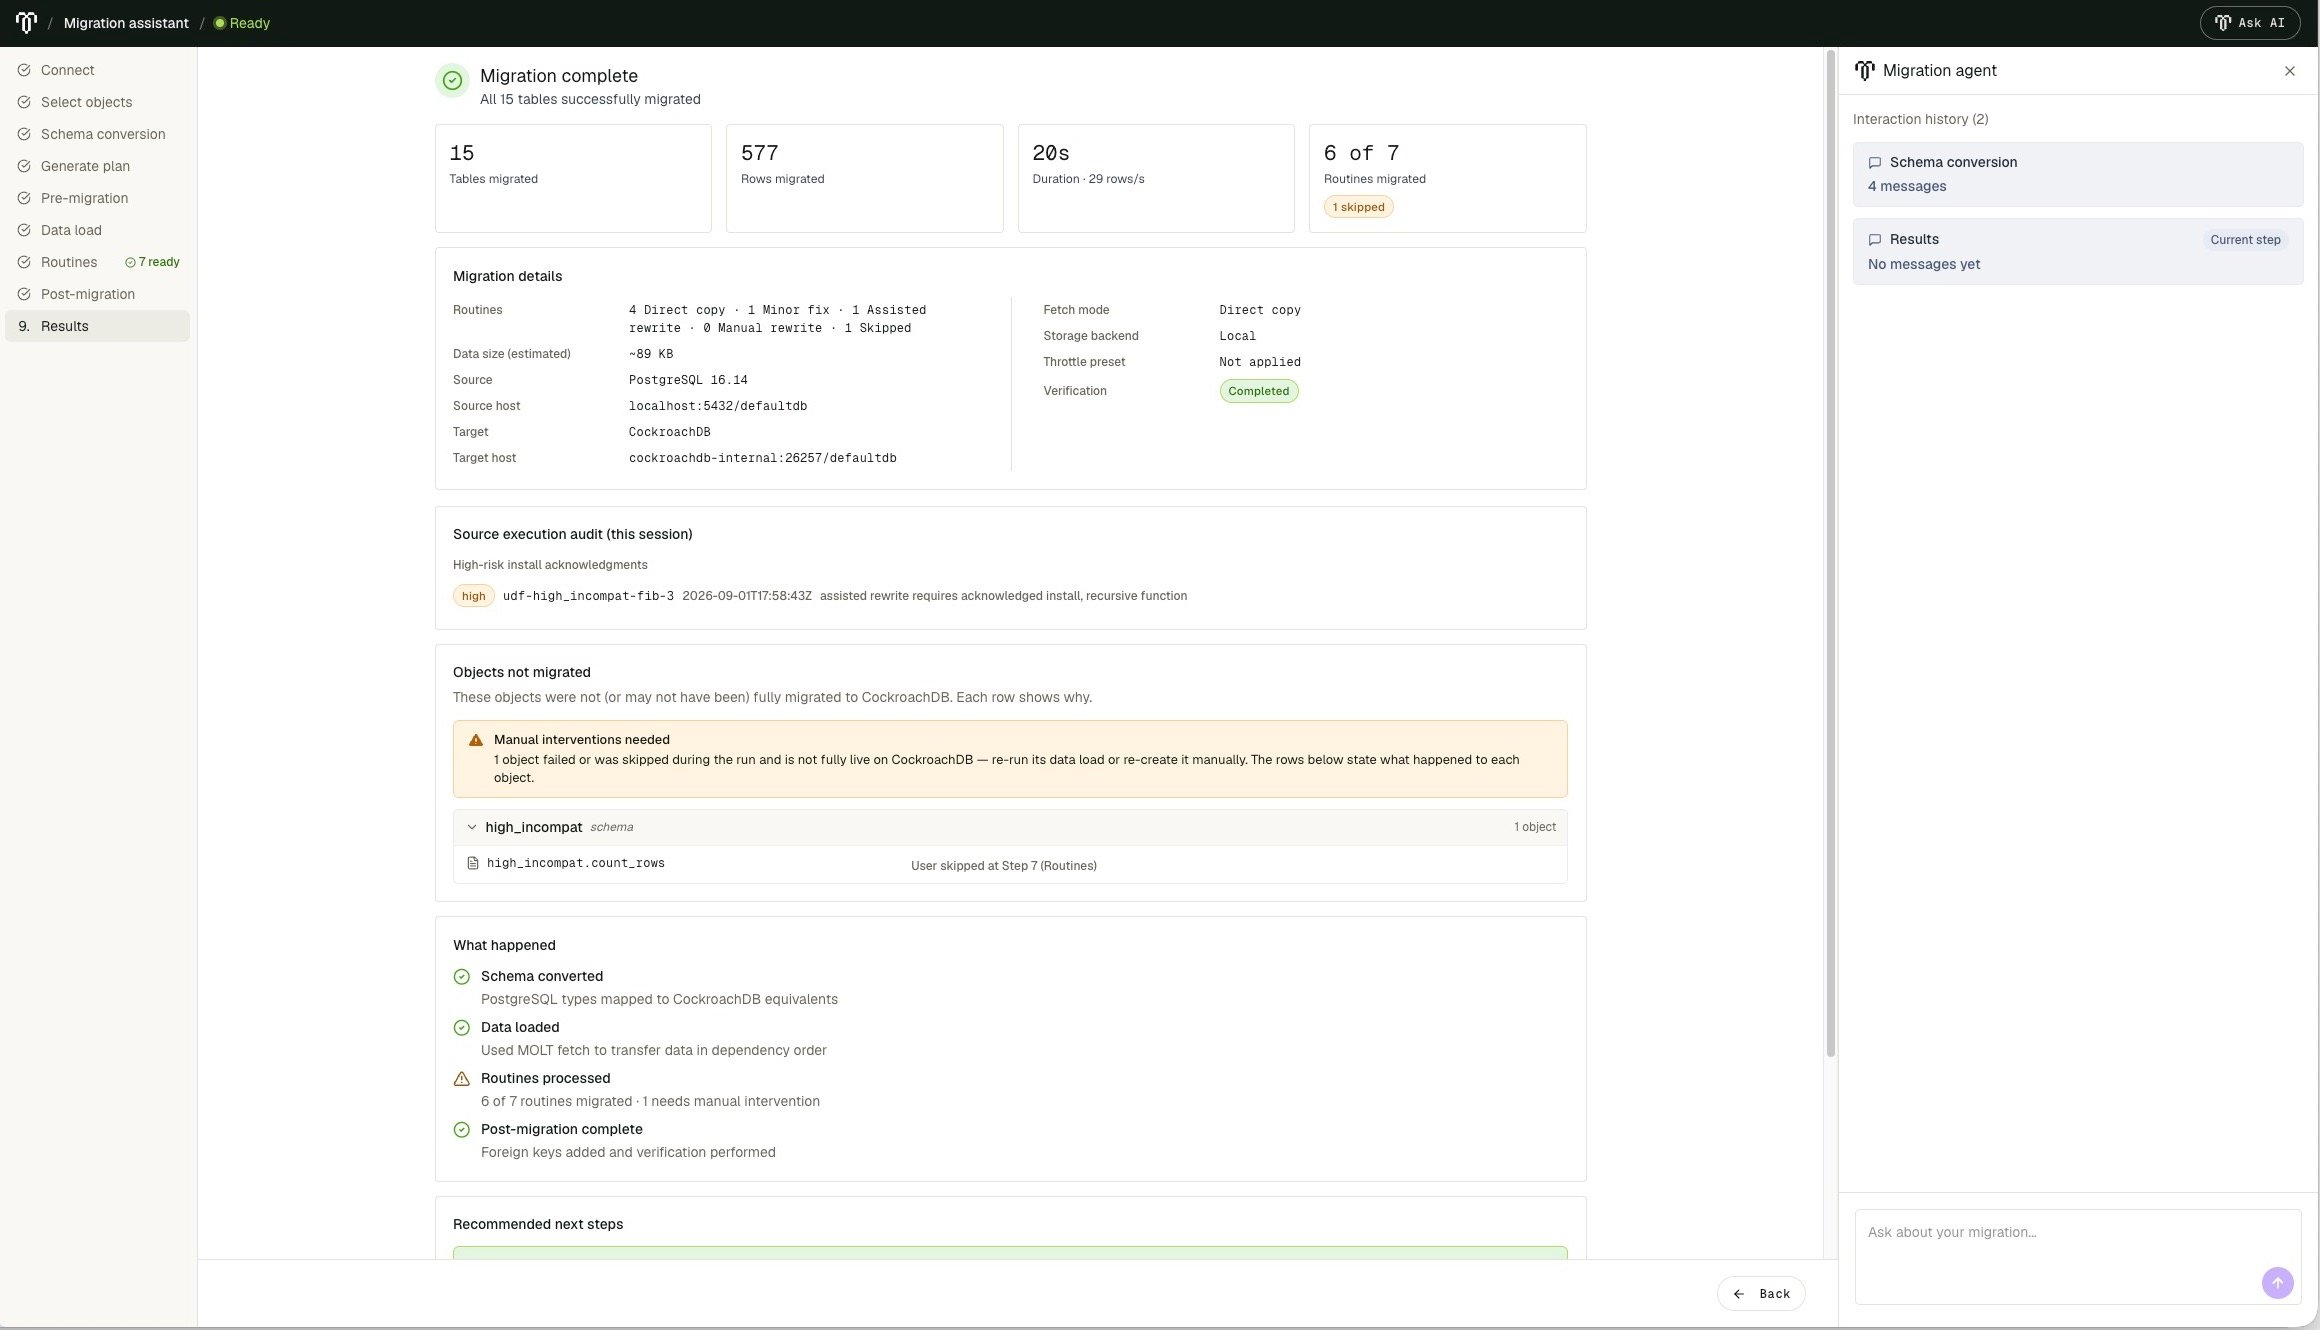
The Results page can mark the guided migration complete while still listing skipped or failed objects that require manual work.- Review the migration totals, source and target versions, duration, throughput, load mode, and verification status.
- Review the source-execution audit and any high-risk acknowledgements.
- Use Objects not migrated as the required work queue. Resolve each skipped or failed object.
- Test application behavior affected by type substitutions or routine rewrites.
- Test and optimize application queries and rehearse the production cutover.